


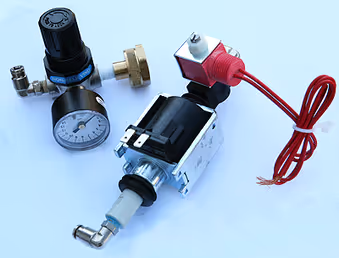
BioPro Pressurized Water Kit
The water pressure kit consists of two pieces of hardware: the solenoid valve, which goes inside your BioPro 190 and the pressure regulator which connects your BioPro 190 to a pressurized water source, like a garden hose, outside your BioPro 190.
Available for shipping or in-store pickup
Please call us for shipping costs and lead times for this product. You can reach our office at 530-894-1793.
BioPro Pressurized Water Kit (installation).
Step 1
Unscrew four screws on the front of the black casing atop your BioPro 190.
Step 2
Lift lid and prop open, either against an adjacent wall or with a dowel, then locate water-valve-to-be-replaced inside machine (in back).
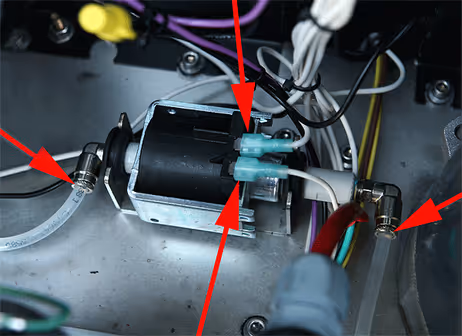
Step 3
Remove four connections (see arrows): 2 for water, two for electrics. Once detached, pull up and remove existing water valve. Note: when removing water connections, depress ends of metal connections, where tubing runs in, to release grip.

Step 4
Locate your replacement solenoid valve.
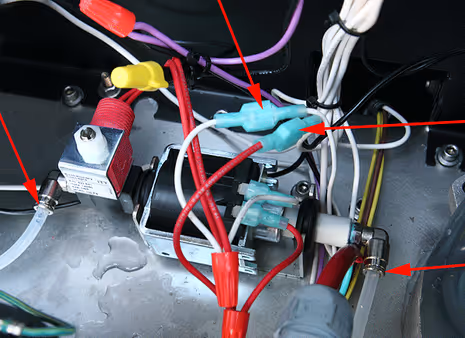
Step 5
Install by reconnecting same four connections removed earlier (see arrows). Note: when seating the new solenoid valve you will have to push the bottom of the water intake pump (at left) to the left to make more room. This is a perfectly acceptable procedure and will not inhibit the performance of your BioPro. Close black lid and screw 4 screws back in place.
Step 6
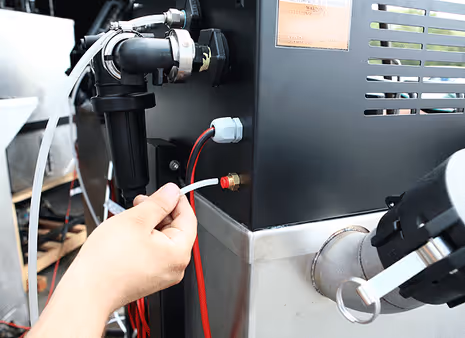
Insert water-in line to back of machine.
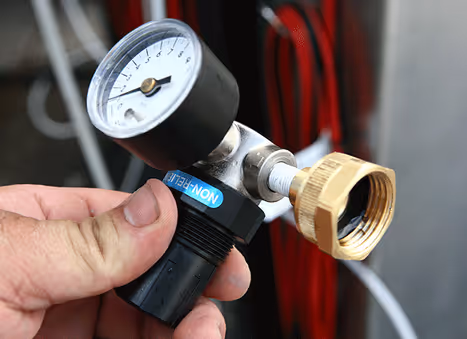
Step 7
Locate water pressure fitting.
Step 8
Attach hose to one end of fitting, and water-in line to other end of fitting.
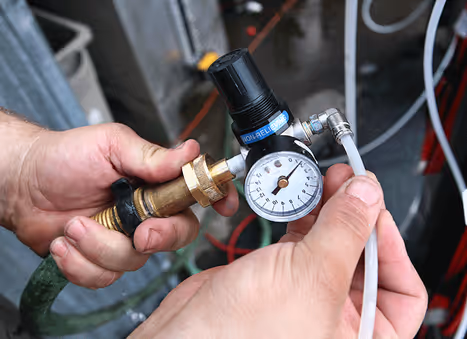
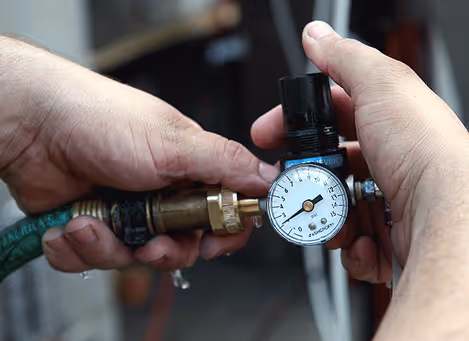
Step 9
Rotate black cylindrical nob on top of fitting to adjust water pressure from hose to 2-3 psi. This is the recommended water pressure for optimal washing conditions.
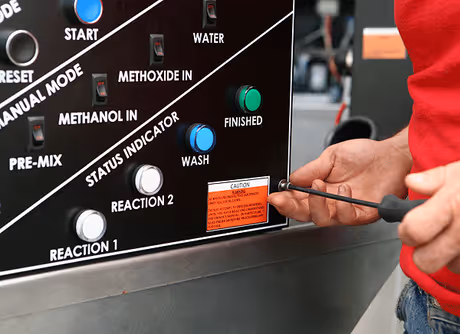
You’re ready to go!
Live in a cold area?
If you need to add vinegar simply pour in the amount you want to add into the main tank (we recommend 1 gallon), before you start your first wash cycle.
.svg)
